Thursday, October 29, 2009

Creating a SharePoint page using Object Model

SPSecurity.RunWithElevatedPrivileges(delegate()
{
SPWeb web = SPContext.Current.Web.Site.RootWeb;
//SPContext.Current.Web;
using (web)
{
web.AllowUnsafeUpdates = true;
SPList list = web.Lists["Pages"]
String url = list.RootFolder.ServerRelativeUrl.ToString();
// if you want to add the new page in a existing folder you can take it by it's ID like below
//SPListItem newFolder = list.Folders.GetItemById(3);
// creating a publishing web
PublishingWeb publishingWeb = PublishingWeb.GetPublishingWeb(web)
PageLayout[] layouts = publishingWeb.GetAvailablePageLayouts();
PageLayout layout = null;
foreach (PageLayout _layout in layouts)
{
//set the page layout to your site's default layout
if
(_layout.Name == "yourpagelayout.aspx")
{
layout = _layout;
break;
}
}
PublishingPage newPage = publishingWeb.GetPublishingPages().Add("sample.aspx", layout);
// setting the URL value to the newPageUrl for redirecting the user after creating it
//newPageUrl = web.Url + "/" + newPage.Url;
newPage.Description = "Sample page from code behind Dynamic Page";
newPage.Title = "Dynamic Page";
newPage.Update();
//Now we can checkin the newly created page to the “pages” library
SPFile pageFile = newPage.ListItem.File;
if (pageFile.CheckOutStatus != SPFile.SPCheckOutStatus.None)
{
pageFile.CheckIn("CheckedIn");
pageFile.Publish("publihsed");
}
}
});

Querying a SharePoint list using CAML (Collaborative Application Markup Language) builder and updating a List using SharePoint Object model.

To Do: First we must have a U2U CAML Query Builder or one must be familiar with CAML query language syntax. Download CAML builder http://www.u2u.info/SharePoint/U2U%20Community%20Tools/U2U%20Caml%20Query%20Builder%202007%20v3.1.0.0%20(windows%20version).zip
Extract the zip file from above download and
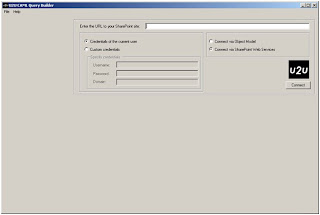
click on U2UCamlCreator.exe which opens the below screen


Now enter the URL of your SharePoint site Ex: http:/servername//sites/mysite/ and use the default settings and click on connect. This will open up all the lists associated with the site as shown below

Now select the desired list on which you want to perform a query. In this case I am selecting a list existing on my site leavenotification and then CAML builder shows all the columns of the list as shown below.


Now select the columns which you require for your application and you can set the where condition to build the query with an option of order by. In my case I am selecting Date From column with a where condition as date lower than or equal as shown below

To DO: 1. Select the column to be filtered

2. Select the Where check box

3. Select a condition for search criteria and click on > button Above 3 steps will generate a XML based CAML query.


To test this query click on Test button and the result will be displayed on a grid as shown below At any point of the time you can change the query by clicking Clear button on top right corner


Using SharePoint object model to query a list with the query generated from CAML builder.
Import Microsoft.sharepoint.dll
Code Part:
Try
{

SPWeb objSPWeb = SPContext.Current.Web.Site.RootWeb;
objSPWeb.AllowUnsafeUpdates = true;
SPList objSPList = objSPWeb.Lists["LeaveNotification"];
SPQuery queryErrData = new SPQuery();
string QueryOrderBy = " 1 "
SPListItemCollection objlistItemsErrLog = objSPList.GetItems(queryErrData);


}
catch
{
throw ;
}
From the above ListItemCollection we can access the result set by looping thru the collection using foreach

Saturday, July 18, 2009

Creating a basic sharepoint webpart

In this post I would like to show how to create a basic webpart in sharepoint server 2007 using VS-2005
Step1. create a visual studio class library project and name it as BasicWebpart as shown below

Step2: rename class1.cs in solution explorer to myWebPart.cs

Step3: Add following references microsoft.sharepoint.dll (which will be available at "C:\Program Files\Common Files\Microsoft Shared\web server extensions\12\ISAPI") and system.web.dll by clicking reference tab in solution explorer. Import two dll's in the class file by "using" like below
using Microsoft.SharePoint;
using System.Web;

step4: inherit webpart class of "Microsoft.SharePoint.dll" with class file as shwon below

public class myWebPart : Microsoft.SharePoint.WebPartPages.WebPart

step5: override render method which is inherited from System.Web.UI.Control to put render some sample text. sample method to render the text
protected override void Render(System.Web.UI.HmlTextWriter writer)
{
writer.Write("This is my First basic Web Part");
}

final myWebPart.cs class file code will be as shown below

using System;
using System.Collections.Generic;
using System.Text;
using Microsoft.SharePoint;
using System.Web;
namespace basicWebpart
{

public class myWebPart : Microsoft.SharePoint.WebPartPages.WebPart
{
protected override void Render(System.Web.UI.HtmlTextWriter writer)
{
writer.Write("this is my first basic webpart");
}
}

}
step6: compile the project with successful compilation.
step7: Open web.config file of sitecollection where you want to add the webpart which will be located at "OS drive\Inetpub\wwwroot\wss\VirtualDirectories\"
and under SafeControls tag add the below tag to reflect our new webpart in sharepoint site.
<SafeControl Assembly=basicWebpart,Culture=neutral" Namespace="basicWebpart" TypeName="*" Safe="True" />

step8: copy the dll which will be resulted from step 6 to bin directory of the sitecollection.

OS Drive\Inetpub\wwwroot\wss\VirtualDirectories\bin"

with the steps 7 and 8 we completed adding our new webpart to site collection.

to add the new webpart open the desired sitecollection and goto site settings and in site setting page select webpart which will be under gallaries section. and click on new

now select the check box corresponding to your webpart and click populate gallery button.


now goto your desired page where you want to add the webpart and click on edit page and click on ADD WEBPART bar

and add your webart


final webpart is ready on your webpage which will be as shown below.

Time Intelligence Functions in Power BI: A Comprehensive Guide

Time intelligence is one of the most powerful features of Power BI, enabling users to analyze data over time periods and extract meaningful ...